Showing posts with label Sweet. Show all posts

Sunday, December 13, 2015

Red Kidney Bean Aquafaba Meringues

My dad was, and probably still is, the very opposite of wasteful. He had a bucket in the shower to collect the cold water before you got in, and used it later for flushing the toilet. He'd put on more clothes, rather than turning on the heater. Food scraps would be eaten where possible, or else taken out to compost.

It pains me just as much to throw food away, which is why I have experimented with eating carrot tops, and cooking with sourdough starter which no longer smelt right. The other night, I made a chili using tinned red kidney beans, and suddenly recalled reading about a recent discovery involving the bean liquid: named aquafaba, it turns out the thick and frothy brine can be whipped up just like egg whites!

While chickpea water has the most neutral flavour, I decided to try making meringues with the red kidney bean liquid I had on hand. What started out as a reddish-brown gloop became paler as it aerated in the food processor.

Red kidney bean liquid before whipping.

The original recipe from Goose Wohlt only calls for 1/2 cup sugar and the liquid from one can of beans, but I didn't seem to be able to get the ingredients to form stiff peaks, so I added cream of tartar and vanilla as well, based on the recipe from Kids with Food Allergies. It took me half an hour to realise I had left the food processor blades in, before switching to the whisk attachment.

Mixture became pale and thick after whipping.

Using the egg whisk gave a much fluffier result, but I still couldn't get the mixture to form stiff peaks, and my food processor was getting hot. I went ahead and spooned the whipped concoction onto baking paper and put it in the oven anyway.

Any peaks disappeared quickly.

Depending on which recipe you pick, you are supposed to bake the meringues at 100C/200F for 1.5 hours, 120C/250F for 40 minutes, or use a mix of temperatures. I baked mine at 100C for 1 hour, then turned off the oven and left them inside overnight.

Baking the aquafaba meringues.

Because I didn't put my meringues into an airtight container in a timely manner, I baked them again the next day to dry them out properly. You need to wait for them to cool first, not just to avoid the moisture being trapped in the storage box, but also because they are soft and sticky while warm—I tried pulling one off the baking paper straight away and the bottom stuck, but those which I removed after cooling slid off effortlessly.

Aquafaba meringue stuck to baking paper while warm.

I'm not sure why the surface of my meringues seemed to have little circles on them, but the result was light and crunchy. Overall, I think they were actually closer to hokey pokey than meringues, because they stuck to your teeth when you ate them, and there seemed to be a bit of malt or caramel flavour.

The aquafaba meringues were light and crunchy.

Breaking the crunchy bits over fresh strawberries and coconut yoghurt greatly reduced the teeth-sticking, and made a tasty vegan and gluten free dessert.

Aquafaba meringues with strawberries and coconut yoghurt.

Apparently, aquafaba can be used to make a variety of different (vegan) dishes, such as:

You can also use it as an egg substitute (including as egg wash) by replacing each egg in many recipes with 3 Tbsp aquafaba.

I was pleased with how my meringues turned out, and amazed by their transformation from a slimy liquid into light and crunchy pillows. I would be tempted to retry these with chickpea brine, and see how aquafaba works in savoury recipes as well. No more tipping bean liquid down the drain—my dad would be pleased!


This post is part of Our Growing Edge, a monthly blogging event aimed at inspiring us to try new things. This month, it is hosted by Jazzmine from Dash of Jazz, with a theme of Nostalgia.

Friday, July 31, 2015

Learning My ABCs (Asian Birthday Cakes)

Mainstream Western cakes that people bring to the office tend to be sweet, dense and moist—think the chocolate whisky cake from Rocket Kitchen, for instance. In contrast, Asian bakery cakes (which people tend to buy for special occasions like birthdays) differ in a few ways:
  1. they are light, soft, and airy
  2. they are less sweet
  3. they tend to have multiple layers
  4. they are covered in whipped cream
  5. they tend to have detailed, maybe even over-the-top, decorations
  6. bonus points for fresh fruit
  7. Asian flavours like taro, durian, mango, or green tea cakes are available

Fresh cream gateau from the Gateau House website.

While you or I could easily whip up a standard cake ourselves by following various recipes from a magazine or cookbook, not many people attempt to make the Western-style cakes* that are sold in Asian countries like Hong Kong, Korea or Vietnam (I was surprised to read this style of cake is also eaten in Mauritius.). Partly, I think it is because people in Asia don't tend to have an oven (they are more likely to steam cakes instead). But it doesn't help that there are not many recipes published for the cakes sold in Asian bakeries**, and they are often quite elaborate and challenging to make at home.

* I say "Western-style cakes" because traditional Asian cakes are a different beast, from the thick and dense mooncakes, to the chewy, steamed, bite-sized kuih.

** By "Asian bakeries", I mean bakeries similar to those you would find in Asian countries, not old-school bakeries that happen to be run by Asians.

There are now plenty of Asian bakeries in Auckland, including Gateau House, La Couronne, Classic Bake House, Well-done Bakery, and Rio Kitchen.

The "Sponge"

It turns out the part of the cake which I had always thought of as "sponge" is only sponge in the general sense, an umbrella term for foam cake. The particular kind of foam cake used in Asian bakery cakes is actually a reduced sugar chiffon. You'll end up with a lighter texture than if you used a standard sponge recipe anyway.

Type of Foam CakeEggsFatTextureOther Comments
SpongeWhites and yolks whipped separatelyNone (other than egg yolks)Firm, yet well aerated, relatively dry
GenoiseWhole eggsButterAiry, relatively dryRich flavour from butter. Less sweet than other foam cakes. Eggs are warmed before beating in sugar.
ChiffonWhites and yolks whipped separatelyOilMoist, light and springyRich flavour from oil. Often has added baking powder.
Angel Food CakeWhites onlyNoneDelicate, light and airyHighest sugar content to support egg whites.

There are all sorts of tips and tricks out there for baking chiffon cake, but the most important ones I found were:

The Cream

As you will see, the whipped cream topping was the part I struggled with the most. Freshly whipped cream tastes amazing, but I either overwhipped it and made it grainy, or it wouldn't hold its shape, and the cake looked like a mess by the time we went to cut it. No matter how hard I tried, my whipped cream did not have the amazing airiness and staying power of the commercial cakes.

I'm not sure what professional bakers use, but I wonder if it might possibly be an imitation whipped cream like Cool Whip or Pastry Pride, though I haven't seen these for sale in New Zealand, and I assume the flavour wouldn't be that great. The Cool Whip ingredients look pretty unappetising, with the main ones being hydrogenated vegetable oil and high fructose corn syrup, and containing less than 2% cream. Bakel's NZ has a new Easy Whip product that is made of dextrose, skim milk powder, vegetable oil, sugar, and stabilisers and emulsifiers. I guess that might be what you are eating if you buy something from those cheap, run-down bakeries.

Cool Whip Original ingredients from Kraft Brands website.

According to some posts online, whipped cream in bakeries holds up longer because it has a higher fat content, or has stabilisers added, such as pectin, xanthum gum or guar gum. Dr Oetker's Whip It product (available to home cooks in North America at least) contains dextrose, modified corn starch, and tricalcium phosphate.

You can achieve amazingly airy whipped cream by using canned whipped cream, as in Tatua's Dairy Whip. Nitrous oxide (N2O) is mixed into the cream and when pressure is released, foams the cream up to four times its liquid volume (compared to whipping by hand which only doubles it). Unfortunately, this whipped cream does not last long, and will go back to liquid form after 20 - 30 minutes.

Up until Lewis Road Creamery started selling double cream (48% fat) a couple of years ago, there was only one kind of cream for sale in New Zealand, with around 37% fat. I can't imagine bakeries making cakes with premium quality organic double cream, so I looked at what methods people used to stabilise their whipped cream:
Also, there's a buttercream recipe (fresh cream not needed) with rave reviews, which apparently has the texture of light whipped cream and is not too sweet. I'll definitely have to give this a go some time!


Cake Attempt #1: Chestnut Chiffon Cake

My parents gave me a bag of fresh chestnuts, so I decided to bake a cake with them in it. It really is a labour of love, because shelling chestnuts is a time-consuming exercise! Most recipes tell you to cut an X into the flat side, but I found it easier cutting a single slit along the rounded side of the chestnuts.

Shelling roasted chestnuts.

Although I had a tray full of roasted chestnuts, there was not enough there for the chestnut chiffon cake recipe I wanted to try, so I supplemented it with tinned chestnuts too.

Canned chestnuts (left) and roasted fresh chestnuts (right).

The sponge came out beautifully, though it did not rise much, presumably because I used baking paper, and did not invert the cake after baking.

Chestnut chiffon cake.

I used the fresh chestnuts in the lighter whipped cream topping, and the canned chestnuts in the intensely dark and delicious caramelly filling (enhanced with a nut flavoured liqueur).

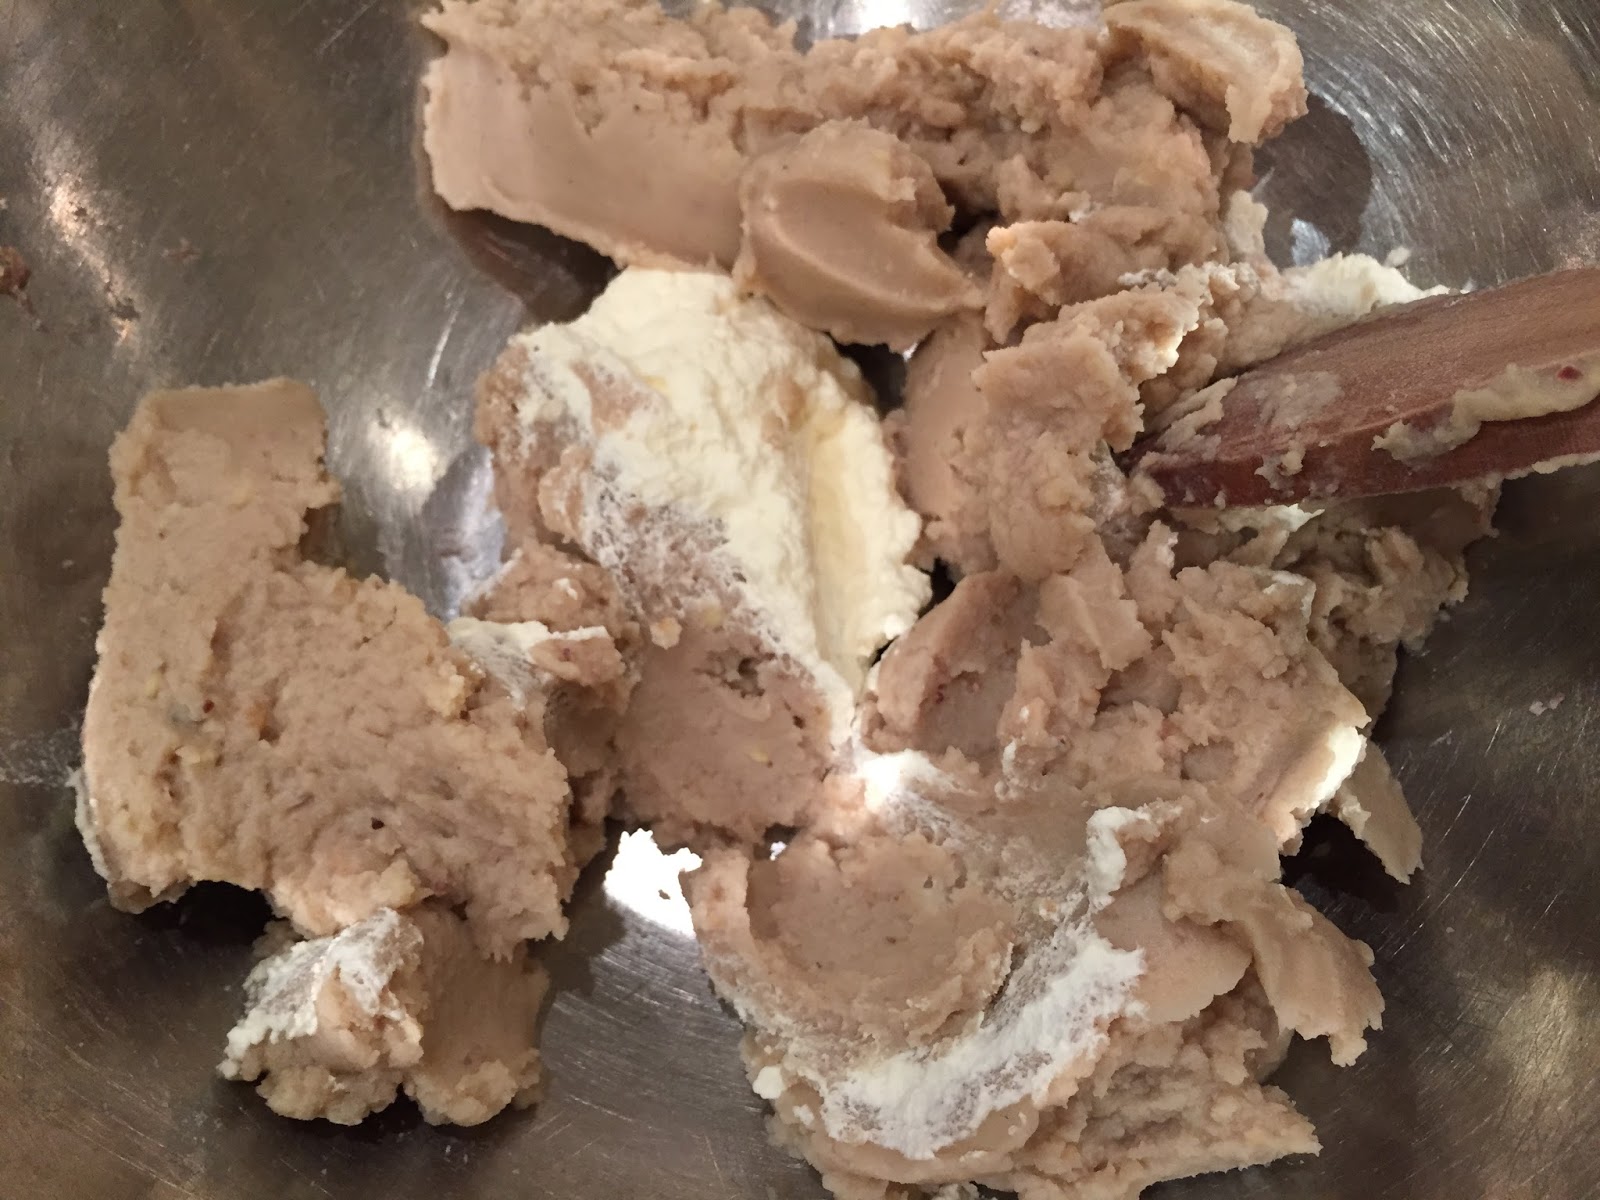
Mixing chestnut cream.

I need to work on my technique a bit as the final cake was on the dense side, but the flavours were worth the effort!

A slice of chestnut chiffon cake.


Cake Attempt #2: Taro Chiffon Cake

Making a taro cake is a lot easier, because you can simply buy frozen taro from your local Asian grocer and steam it—it's not such a fiddly process as boiling, roasting and shelling fresh chestnuts.

Mashing steamed taro.

I used a Japanese chiffon cake recipe, and Eupho Cafe's taro filling (minus the coffee creamer). The chiffon cake came out very springy, but I found its flavour overwhelmingly eggy.

Japanese chiffon cake.

The taro filling was lumpy and solid when I first mixed it, but once I put it into the food processor for a few minutes, it turned into a smooth and fluffy spread.

Taro filling, smooth filling on top, lumpy filling at the bottom.

If it weren't for the strong egg flavour in the sponge, this would have been an excellent cake!

Cake Attempt #3: Durian Cake

In an attempt to reduce the egginess of the cake, I tried making an angel food cake, which only uses egg whites. Unfortunately, I lined the bottom of the pan with a circle of baking paper this time, and it made a crater when the cake was turned upside down.

Curved bottom of angel food cake.

It was also cloyingly sweet, though it did have a very soft and light texture. I ended up chopping it into cubes, coating it in dark chocolate, and palming it off to workmates.

Levelling the bottom of the cake.

Next, I tried Nasi Lemak Lover's Vanilla Sponge Cake. It had me baking the cake for over an hour, which was a lot longer than some other recipes, though admittedly at a lower temperature and for a higher volume of batter. The top of the cake split, and the outside seemed to have browned too much, so it was a bit dry and overcooked.

Overcooked cake.

I tried the recipe again, this time lowering the temperature at the end, turning the oven off altogether for the last 10 minutes. It rose promisingly high...

Cake rose high.

... but still cracked after further baking.

Flattened and cracked.

Although I turned it upside down for cooling, it actually shrank upwards (away from the bench), and ended up being pretty dark as well. The taste and texture of the sponge were pretty much perfect once I cut away the unsightly parts though.

Cake shrank on cooling.

With the chiffon sorted, I mixed up my own durian filling using about half a frozen durian (it takes a good few hours to thaw!) and about the same amount of sweetened whipped cream. I should have used a bit more sugar to bring out the flavour of the durian, but it seemed fine on its own, and I forgot to take into account the fact that the sponge part was not very sweet either.

Creamy flesh of thawed frozen durian.

I decorated the cake with whipped cream mixed with a bit of milk powder and icing sugar, and also added some slices of dried durian candy. Not the most beautiful of creations, but you'll love this if you like the aroma of durian!

My durian chiffon cake,

Cake Attempt #4: Mango Chiffon Cake

For my final cake, I made a mango chiffon cake with a layer of pudding mix in the middle, as well as custard (okay, maybe pastry cream is more accurate) and tinned mangoes.

I used the same chiffon recipe as before, but placed a piece of foil over the pan to protect the top of the cake once it started browning. I didn't get the same splitting and dark colouring I saw earlier, but it still sank even after being cooled upside down.

Some sinking in my chiffon.

Once you slice the top off, it doesn't really matter anymore though!

Chiffon cake, sliced horizontally.

I added less water to the mango flavoured pudding mix than instructed, so that it would have a more intense fragrance, but it was very sweet, so I thinned it out a bit again. I poured the liquid into a springform cake tin lined with baking paper, which wrinkled up from the moisture, as you can see in the picture below. After refrigeration, it set into a very slippery round of jelly which smelt more mangoey than real mangoes themselves.

Jelly-like mango pudding layer.

Although the jelly sat on top of the cake layer with no problems, the next layer (pastry cream with mango pieces which I dolloped on top) threatened to slide right off.

Pastry cream and mango layer on top of the pudding layer.

Indeed, that is exactly what happened, after the cake was transported to a restaurant, put in the fridge, and taken out again at the end of our meal. The entire top half of the cake shifted slideways, making it look like a spectacularly chaotic heap.

Top half of the cake slid to one side.

Looks aside, the cake tasted better than I expected, thanks in no small part to the Asian mango pudding mix, which also added an interesting texture contrasting with the softness of the cream and the sponginess of the chiffon. Thanks, artificial flavours and colours!

A very thin but tasty slice of mango chiffon cake.


This post is part of Our Growing Edge, a monthly blogging event aimed at inspiring us to try new things. This month, it is hosted by Pia from Joie de Vivre and Cupcakes, with the theme "party with friends".

Saturday, April 4, 2015

Homemade Sourdough Hot Cross Buns

Ever since I was gifted some sourdough starter many months ago, I have kept it barely alive in my fridge, baking the odd bread, and making many more sourdough crumpets than I needed. (If you have ever tried making sourdough before, you will know the starter gets out of hand very quickly, since every time you feed it flour and water, you are doubling its volume.)

Naturally, when Easter rolled around and I thought about baking hot cross buns, I looked around for a sourdough recipe. Apart from needing to use up starter again, you can't buy sourdough hot cross buns in many places, and I was keen to taste them fresh from the oven. It's just as well we have public holidays right now, because they took quite some time to make, but the end results were delicious, if I do so say myself!

Homemade sourdough hot cross buns.

Here are some snaps from the bun making process. I settled on Kresha Faber's recipe on Nourishing Joy, simply because the photo of her creations looked so amazing.

I was lazy and pulled the starter straight out of the fridge, rather than feeding it again to make sure it was at optimum health. It had bubbled out of the jar a couple of days earlier, and I didn't really need twice as much batter again!

Sourdough starter with not as many bubbles as earlier.

The dough was supposed to come out sticky, but mine was getting dry, so I stopped adding flour, and even added a bit of water back in.

Combining the starter with the other ingredients for the dough.

Rather than making 24 hot cross buns of the same type, I divided the dough in half, and replaced the raisins with chocolate bits in one half. The pictures below are of the raisin ones though. Adding the butter made it beautifully soft.

Half of dough, with raisins and fruit peel mixed in.

After a couple of rounds of resting, the dough hadn't grown much, and I was worried that my buns would turn out to be dense bricks. However, I went ahead and shaped the dough into balls and placed them into buttered pans anyway.

Half of dough shaped into 12 balls.

To help the process along, I placed a piece of cling film (dusted with flour) over each tray and let the balls rise in the warmth of our hot water cupboard for 4 hours. They started nudging up against each other.

Dough after 4 hours in the hot water cupboard.

The recipe didn't specify how to make the crosses, so I followed the instructions from another recipe, this time from Paul Hollywood in the Good Food magazine. Unfortunately, I took "about 5 tbsp water" to mean exactly that much, and I ended up with a stiff batter that was very difficult to pipe. The crosses also came out quite hard after baking.

Buns piped with crosses.

The bread came out of the oven with a golden crust, looking a bit dry...

Hot cross buns after baking.

... but brushing on the glaze (I had no orange juice, so just thinned honey with a little bit of water) caused the crust make crackling noises and look a whole lot more appealing.

Hot cross buns after glazing.

I am used to supermarket hot cross buns being completely soft, but I enjoyed my own flavourful rolls with a crackly crust more, especially when hot and fresh. The bread was soft on the inside, and beautifully fragrant with lashings of butter.

Enjoying my hot cross buns.

This recipe made quite a few buns, so even though I gave half away, I may have to turn the rest into bread and butter pudding when they get stale. If you didn't want the buns to stick together, you would need to leave more space between them, so you could consider halving all the ingredients. To make them even better, I would be tempted to try using a more custardy recipe for the crosses next time, like in Ima's ones. Having said that, my first batch of hot cross buns exceeded my expectations anyway!


This post is part of Our Growing Edge, a monthly blogging event aimed at inspiring us to try new things. This month, it is hosted by Nikki from Everyday Life Mom.

Saturday, May 31, 2014

Homemade Eggettes or Gai Daan Jai (雞蛋仔)

While most of you have probably been helping yourself to chocolate Easter eggs last month, my mind has been occupied by an entirely different kind of eggy treat: the Hong Kong street snack called gai daan jai (雞蛋仔), which translates to a diminutive of the word for egg. For this reason, I prefer the terms "eggettes" or "egglets", though they are known by a variety of names, including Egg Waffle, Hong Kong Waffle (even though they actually sell the waffles with the grid pattern in Hong Kong as well), Waffle Balls, Bubble Waffle, Mini Egg Puff, Egg Cake, or simply Gai Daan Jai.

My homemade gai daan jai.

The basic ingredients of this iconic Hong Kong street food are only flour, eggs, and sugar. But there are many variations, and businesses will not share their secrets lightly. The quality between the different vendors can differ greatly, as we discovered first hand, and they look deceptively easy to make. After fail after fail in my kitchen, however, I can assure you that these simple snacks require a high level of skill indeed!

History

Although there is no definitive answer as to how gai daan jai were invented, most people seem to say they originated in Hong Kong around 1950, as refugees fleeing civil war in China flooded into the city. With a growing population, entrepreneurs came up with creative ways to make the best use of scarce resources under strict government price control. Apparently, back then, eggettes were cooked at streetside carts over charcoal stoves, and sold by the egglet for 1 cent.

Some claim they began as a way for small grocers to use up broken eggs, while others say the egg-shaped mould was used to make up for an eggless batter. Eggs may be less of a luxury these days, but it is certainly harder now to get hold of the more flavourful duck eggs which some sellers used at the time.

Sadly, it is now illegal for most waffle vendors to ply their trade in the streets of Hong Kong. With a goal of public health and safety, government officials stopped issuing new hawker licences in the early 1970s. High profile arrests of traditional but permitless cart holders have provoked public outrage, with commentators lamenting the loss of the city's street food culture.

Eggette seller cooking over a charcoal stove.

Makers of eggettes have also largely abandoned the use of charcoal stoves for gas-powered ones, or have switched to electric moulds.

Related Articles
Videos in Cantonese
  • 《文化多面睇 炭燒雞蛋仔伯伯》 (NOW BNC, 2 September 2012) - Mr Ng, a 75-year-old eggette seller who entered the trade in 1982, still uses charcoal stoves and shares his recipe with kids; he cannot afford to open a shop, and the government stopped issuing hawker licences in the 1970s, hence the illegal work; misinformation also led to demise of the street-sellers (posters showed them as horrific and dirty)
  • 《名廚。食出五味人生》 (i-Cable Channel 12 娛樂台, 9 September 2012) - Mr Ng says that no eggs were used at the beginning; eggettes take 8 minutes to cook; interview with Eric from Gu Fah Bakery, a specialist eggette store with modern flavours, using beer to make the dough rise.
  • 《雞蛋仔。香港地道小吃》 (Firewalk Productions, 25 November 2012) - Mr Liu, owner of LKK North Point Eggettes, says his mother used duck eggs in the 1950s; it takes 7 - 8 minutes to cook an eggette; he makes a batch of batter using 400 eggs.

The Ideal

In a previous post, I shared our favourite spot in Hong Kong for eating eggettes. While eggettes from other vendors are frequently disappointingly limp and soggy, those from LKK North Point Eggettes are consistently fresh and crunchy on the outside, with a soft pillow against one side inside. As another blogger aptly describes it, they are addictive, "just like popping bubble wrap".

I would say that excellent eggettes need to have the following characteristics:
  • crisp on the outside, but soft on the inside
  • the little balls should be interconnected, so you can snap them apart with satisfaction
  • they should be evenly lightly golden, with the balls the same colour as the bits joining them together
  • smooth shiny surface
  • fresh, fragrant flavour
Related Articles
Equipment

Unlike Chinese egg rolls, you definitely need specialist equipment to make eggettes. How else would you be able to mould your batter into little balls?

I wanted something basic, so I purchased a traditional eggette pan from Shanghai Street in Hong Kong. These old fashioned devices are basically made of two metal moulds that fit together, attached to wooden handles. I was surprised to see that the two halves were not the same - the bottom was significantly deeper than the top half.

Traditional eggette pan.
There are very few of the old-school eggette craftsmen left, who still use the traditional moulds over charcoal fires. Most commercial eggette sellers in Hong Kong now use electric eggette makers, which can simultaneously heat your batter on both sides, as well as providing a constant, controlled temperature without any effort from the cook. They may also have a Teflon-coated surface, so the waffle can be removed easily.

Egg waffle maker from Alibaba and Shentop.

If you can't get hold of either of the above, then you might want to consider Western-style eggette makers, which don't look quite right because they tend to make completely round balls rather than egg-shaped ones. As before, you can either get these as a standalone pan, or as electric one.

Nordic Ware Egg Waffle Pan and CucinaPro Bubble Waffler.

Recipe for the Batter

Depending on what you search the internet for, you will end up with different recipes for gai daan jai. I ignored the ones that were clearly not what I was after, such as those using pancake mix or a sourdough starter.

Looking for "eggette recipe" or "Hong Kong waffle recipe" turned up two basic recipes, with a number of different sites repeating them (sometimes without accreditation!). Christine's recipe provided by Anne Yeung (published September 2010) is the more Asian version and seems to be very popular. It has the same proportions of ingredients as the recipe shared by I Love Cake (video uploaded September 2009), but differs slightly in the method, for instance not using an electric egg beater, adding the oil after the flour (rather than mixing it with the wet ingredients), and letting the batter stand for an hour in the fridge instead of at room temperature. It is also almost the same as Recipe 1 shared on the eGullet forum (posted July 2005). The other recipe that frequently pops up is the one provided by Williams-Sonoma, which seems totally inauthentic, calling for the egg whites and yolks to be beaten separately, and adding unconventional spices in the form of nutmeg.

Search for "gai daan jai recipe" and you get the same top hits, but also a couple of extra recipes such as one from Hong Kong Lightbox (published August 2008). This recipe is nearly identical to the one I found in Fan-Yuk Hui Chan's Chinese-English cookbook 香港特色小吃 Distinctive Snacks of Hong Kong (17th edition published February 2010, first published September 1998), but with the use of cornflour rather than tapioca starch. As a reviewer pointed out, despite the book having an egg waffle on the cover, it "doesn't taste like the real thing". There is also a recipe from Wynwyn's Place, which is given without any description or picture, but has a higher egg content than the other recipes I have seen so far.

Google "雞蛋仔" or "雞蛋仔 recipe" and there are a few more new recipes, such as one given by Yvonne Lo (published July 2010), directly after writing about the Lee Keung Kee North Point Eggette shop—though I am pretty sure the business owner would never give his recipe away. I also found a recipe in Chinese (published April 2012) that was different again, with no evaporated milk.

I think the oldest recipe I found online was one posted in Google Groups in September 2003 by Betty Lee, who in turn was quoting Anna Au (though the address http://www.pipeline.com/~rosskat/wizzab.html does not exist anymore), who had found a recipe in her sister's Chinese cookbook. It had a high ratio of eggs, unlike another recipe from a Reddit forum post, which had far more flour and water.

Searching for videos on YouTube turned up a few more variations. For instance, the eggettes from the Gu Fah Bakery (古法烘焙) are apparently made with beer. Mr Ng, the "eggette uncle" (雞蛋仔伯伯) who was arrested and heavily fined multiple times for selling these delicious snacks (and has now sadly passed away), shares his simpler recipe containing only the four ingredients of egg, flour, sugar and oil - though he also adds a powdery "secret ingredient" as well as water.

I suspect, however, that technique you use has as much, if not more, to do with the outcome than the recipe you choose.

Technique

I wanted to reproduce the eggettes of the LKK North Point store, and watched a bunch of videos of their creations being cooked. However, as they use electric waffle irons, I was not able to learn much. Basically, they pour the batter to fill the indentations, then flip the pan once, and pretty much just leave it for 7-8 minutes. This would not work with my eggette mould as I can only heat one side at a time. They then remove the eggette, curve it, let air from a fan blow across it, and put it into a paper bag with breathing holes.

Clearly, I would need to learn from the charcoal stove eggette makers instead. Rather than flooding the mould full, they pour the batter in a spiral pattern to make a thin coating, then swirl the pan around in all directions to distribute the contents. Sometimes I see them wiping down the flat sides with a cloth while the eggette is cooking. They flip the pan 3 to 5 times, and the finished product is ready in less than 2 minutes in many cases. Unlike the ones at LKK, these eggettes just drop out of the mould when cooked. The waffles are cooled flat, and often fall apart when being bagged. I guess they must be delicious and crispy, when people will queue for an hour for them.


My Learnings

I learnt a lot of things in the course of my experiments, other than the fact that the mould is pretty heavy.

Tip 1: Season your pan

NB. Do not do this if you have a non-stick pan! When I first started making eggettes, I brushed oil on to the mould before pouring in the batter. After burning the bristles of my brush by mistake, I switched to the quicker method of using cooking spray. But even though I sprayed between every single batch, the waffles still stuck to the pan.

Eventually, I realised I was doing something wrong, and looked up how to season my pan. I brushed oil onto the cold cooking surface (not forgetting the edges), then fired up the gas burner and heated the mould until the oil began to smoke. I switched off the heat and let the pan cool, before wiping away excess oil with a paper towel, and repeating the whole process again.

Seasoning the pan not only made it easier to remove the egg waffles, it made the browning of the cake a lot more even. I guess you see the same effect when you are making pancakes, when the first lot (where you added oil) has more colour contrast than the later versions (where you are cooking on a dry frying pan).

Uneven cooking in unseasoned mould, with dark and light patches.

Oh, and as you will be burning oil during the seasoning process, don't forget to open the doors!

Tip 2: Pick an eggy batter

Mr Liu said that the secret to his LKK North Point eggettes is to use plenty of eggs. At first, I thought this was just a marketing gimmick, just a thing that was mentioned to avoid giving away the true secret of his recipe, and to make it sound like his creations were worth more, being made with more expensive ingredients for extra flavour.

Having tried a few different recipes now, I have to say the ones with more eggs definitely taste better. Not only that, they give rise to a crispier result. In contrast, the more watery batters took longer to cook and had a habit of expanding (presumably from the steam) during cooking.

These eggettes pushed the two halves of my mould apart.
Although I am still experimenting, my favourite recipe so far is the one from Wynwyn's Place, which looks like this:
3 eggs
1/2 C sugar
2 T butter, melted
1/4 C milk
2 T cornstarch
2/3 C flour
1 t baking powder
1. Beat eggs whilst gradually adding sugar until fluffy.
2. Gently stir in milk.
3. Sift dry ingredients into egg mixture. Fold gently to combine.
4. Stir through melted butter.
5. Grease waffle plate with oil and heat on stove. Make sure plates are hot before adding batter.
6. Fill plates about 60% full with batter and cook over moderate heat for approx. 2 minutes on each side or until golden and puffy.

Tip 3: Pour your batter from a jug

I started off being lazy and just scooped ladles of batter onto the eggette mould. It is much more efficient, and easier to get the batter to where you want it, if you have everything in a jug though, so you can simply pour it as you wish, rather than having some batter cook while you are reaching for another ladle.

Tip 4: Line your stovetop with foil

There are going to be accidents. Batter will drip out of the pan. If you want to save yourself all the cleaning effort later, line your stovetop with foil first.

Spilt batter - should have lined the stovetop earlier.

Tip 5: Swing your pan to distribute the batter

You want the little balls to be interconnected. If you just pour the batter into the indentations and don't move your mould around, you will end up with discrete spheres that don't hold onto their neighbours. Swinging your pan will ensure that the batter goes up the sides rather than pooling at the bottom, so that your creation does in fact look like little eggs.

Separate balls from not getting batter in between them.

Tip 6: Let it breathe

After cooking, don't just throw your eggettes in a pile. You want to leave them spread on a cooling rack so that the steam can evaporate. You can also help this process by fanning away the moisture.

Final Tip: Practice makes perfect!

Don't give up just because your first batch was no good! Nobody gets it right the first time, and those professionals who make it look so easy have been practising for years!

One of my failures.
Better eggettes made later that same evening.
Hope you enjoy making eggettes yourself, and let me know if you have any other tips to share!

This post is part of Our Growing Edge, a monthly blogging event aimed at inspiring us to try new things. This month, it is hosted by Eva from Kitchen Inspirations.
Related Posts Plugin for WordPress, Blogger...