Showing posts with label Panda in the Kitchen. Show all posts

Saturday, January 30, 2016

Averting a Pita Panic

My first attempt at making sourdough pita bread was so successful that I decided to invite the whole family over for a BBQ, where I would impress them with my baking skills. What I didn't count on was getting different results every time I tried making pita bread since then.

Rescue Mission #1: Pita Chips

To prepare for the gathering, I tried a recipe which required less sourdough starter, and used a mix of wholemeal and white flour. I impatiently started baking without waiting for the dough to fully double in size, and also pulled the rounds out of the oven after a shorter amount of time to stop the bread getting dry.

Smaller bubbles that did not join into a pocket.

Not surprisingly, these "pitas" did not rise much, and I wasn't entirely sure whether they were fully cooked.

Not much rising going on here, and the colour didn't look right.

Before giving up altogether, I rolled the final dough ball thinner than usual, let the oven heat for longer, and managed to make a large pita pocket. This would be a good option for someone wanting a lower carb pita sandwich, but the thinner bread did go stale more quickly that the thicker ones I made earlier.

In this batch of dough, thinness worked better.

I sliced up the rest of the bread into triangles, brushed them with olive oil, sprinkled salt and pepper over them, and baked them until golden.

Pita chips made from bread that did not rise well.

These pita chips were a great accompaniment to my homemade hummus!

Pita chips with homemade hummus, garnished with olive oil and sumac.

Rescue Mission #2: Manakish Za'atar or Pizza

Although my bread did not puff up into what I would consider pita, I suspected that I just didn't let the dough rise enough. The results weren't really that bad, and I was sure I could get it right next time. I set about trying to produce more sourdough starter quickly, taking it out of the fridge and letting it sit on the kitchen counter. Unfortunately, I left my starter out too long (well over a day), and after making plenty of bubbles, it seemed to have been taken over by some other organisms. After feeding it a couple of times in blind optimism, it turned into a runny goo with no elasticity, which also didn't smell quite right. It was not going to recover in time for the BBQ, so I turned to Plan B: using store-bought yeast.

The recipe in the New York Times called for 2 teaspoons of yeast, but I only had just over 1 teaspoon left in the cupboard. I figured that wouldn't be a problem, as long as I let the dough rise long enough. I tried rolling it thinner, since that helped last time, but I still ended up with several air pockets rather than one large one, more like naan than pita.

Naan-like bubbles.

Perhaps it was because I rolled the dough out in plenty of flour, taking away the moisture that's needed so the steam can do its work. Perhaps the pizza stone under the baking sheet simply wasn't hot enough yet. In any case, it wasn't working.

I had mixed up some za'atar as we had too much thyme in the garden (though it's probably not the right kind of thyme to use). I sprinkled it now over the dough discs, after brushing them with olive oil.

Bread topped with olive oil and za'atar.

Fresh bread is always delicious anyway, even when just seasoned and brushed with olive oil, but the manakish za'atar was a tasty and novel option.

My manakish za'atar.

By changing the toppings, you could also make some mini pizzas.

Crispy, thin pizzas from pita dough.

Of course, I went and bought more yeast after this trial run - I still intended to make pita bread for people, after all.

Rescue Mission #3: Flour Tortillas

I prepared a lot of dough for our BBQ, just to be on the safe side. Inevitably, there was more of it than people could eat, and our fridge was already full from all the meats and salads that were left over, so the unused mixture sat at room temperature for more than a day. In hindsight, I should have just baked all of it, and put the leftover pitas in the freezer (they defrost easily in the toaster, and will even puff up again if they did so originally). However, when you are entertaining guests, there are other things you want to do with your time.

The excess batch of dough had risen, then deflated, and now smelt rather alcoholic. It was also quite wet, so I added plenty of flour to bring it back to the right consistency. I rolled balls of dough into thin discs to make something like flour tortillas, and cooked them over a hot, dry, cast iron frying pan.

Small bubbles would develop across each round of dough, which is probably when you want to flip it to cook the other side, then transfer it to a plate covered with a tea towel, simultaneously keeping it warm and moist.

Little bubbles on the flatbread.

If you cook it for longer, the small bubbles may join up into a large bubble, essentially giving you pita bread, but then you run the risk of burning part of it, as I did in the video below (fast forward through and the bubble growth looks like magic):


Thin pita pocket in a pan.

These rounds of bread still tasted a little sour and alcoholic, but if you eat them with some flavourful fillings, it's not going to be a problem!

Flatbread with dips and salads: hummus, toum, baba ghanoush, muhammara, tabbouleh and a tomato salad.
Taquitos with refried beans, grated cheese, avocado and tomato salsa.

Other Ideas

I haven't tried these yet, but I imagine you could also easily turn your dough into gözleme, Chinese spring onion pancakes, and the like. Have fun!

Sunday, December 13, 2015

Red Kidney Bean Aquafaba Meringues

My dad was, and probably still is, the very opposite of wasteful. He had a bucket in the shower to collect the cold water before you got in, and used it later for flushing the toilet. He'd put on more clothes, rather than turning on the heater. Food scraps would be eaten where possible, or else taken out to compost.

It pains me just as much to throw food away, which is why I have experimented with eating carrot tops, and cooking with sourdough starter which no longer smelt right. The other night, I made a chili using tinned red kidney beans, and suddenly recalled reading about a recent discovery involving the bean liquid: named aquafaba, it turns out the thick and frothy brine can be whipped up just like egg whites!

While chickpea water has the most neutral flavour, I decided to try making meringues with the red kidney bean liquid I had on hand. What started out as a reddish-brown gloop became paler as it aerated in the food processor.

Red kidney bean liquid before whipping.

The original recipe from Goose Wohlt only calls for 1/2 cup sugar and the liquid from one can of beans, but I didn't seem to be able to get the ingredients to form stiff peaks, so I added cream of tartar and vanilla as well, based on the recipe from Kids with Food Allergies. It took me half an hour to realise I had left the food processor blades in, before switching to the whisk attachment.

Mixture became pale and thick after whipping.

Using the egg whisk gave a much fluffier result, but I still couldn't get the mixture to form stiff peaks, and my food processor was getting hot. I went ahead and spooned the whipped concoction onto baking paper and put it in the oven anyway.

Any peaks disappeared quickly.

Depending on which recipe you pick, you are supposed to bake the meringues at 100C/200F for 1.5 hours120C/250F for 40 minutes, or use a mix of temperatures. I baked mine at 100C for 1 hour, then turned off the oven and left them inside overnight.

Baking the aquafaba meringues.

Because I didn't put my meringues into an airtight container in a timely manner, I baked them again the next day to dry them out properly. You need to wait for them to cool first, not just to avoid the moisture being trapped in the storage box, but also because they are soft and sticky while warm—I tried pulling one off the baking paper straight away and the bottom stuck, but those which I removed after cooling slid off effortlessly.

Aquafaba meringue stuck to baking paper while warm.

I'm not sure why the surface of my meringues seemed to have little circles on them, but the result was light and crunchy. Overall, I think they were actually closer to hokey pokey than meringues, because they stuck to your teeth when you ate them, and there seemed to be a bit of malt or caramel flavour.

The aquafaba meringues were light and crunchy.

Breaking the crunchy bits over fresh strawberries and coconut yoghurt greatly reduced the teeth-sticking, and made a tasty vegan and gluten free dessert.

Aquafaba meringues with strawberries and coconut yoghurt.

Apparently, aquafaba can be used to make a variety of different (vegan) dishes, such as:

You can also use it as an egg substitute (including as egg wash) by replacing each egg in many recipes with 3 Tbsp aquafaba.

I was pleased with how my meringues turned out, and amazed by their transformation from a slimy liquid into light and crunchy pillows. I would be tempted to retry these with chickpea brine, and see how aquafaba works in savoury recipes as well. No more tipping bean liquid down the drain—my dad would be pleased!


This post is part of Our Growing Edge, a monthly blogging event aimed at inspiring us to try new things. This month, it is hosted by Jazzmine from Dash of Jazz, with a theme of Nostalgia.

Saturday, October 31, 2015

Homemade Sourdough Pita Bread

It's funny how one thing leads to another. I was looking for recipes to use up the excess thyme we have in the garden, and came across Bint Rhoda's za'atar bread. From there, it was only a link away from khubiz arabi cooked in a cast iron pan, which inspired me to compare it to pita bread.

My homemade sourdough pita bread.

Susan's pita bread on her Wild Yeast blog looked amazing, seemed pretty simple to make, and used up a lot of sourdough starter, so I decided to go with her recipe. I generally try to follow the instructions carefully, the first time I make something, but I discovered I didn't have quite as much starter as I thought, which meant I ended up only using 320g of it rather than her rather exact 376g.

It became too late for baking, so I put the dough into the fridge, where it sat for 2 days before I had time to do anything with it. To bring it back to the right temperature, I transferred it, in its covered bowl, into a warm water bath in the kitchen sink. Unfortunately, some water got into the bowl, and I hastily patted the dough dry with a paper towel. Fortunately, that was the last of the mishaps I encountered.

I divided the dough into balls, flattened each one to a few millimetres thick, put two or three of them onto a baking sheet, and slid everything onto a pre-heated pizza stone in the oven. It didn't take long before the bread started puffing up!

Dough rolled out into flat rounds.

Starting to puff up.

Bigger bubbles.

Conjoined bubbles.

It was a lot of fun watching the dough rise in the oven, sometimes with multiple bubbles joining up into a giant air pocket. I was worried that it may not be fully cooked through, so left the bread in the oven for a few extra minutes, which made the pitas a little dry.

I used to wonder how bakers got the holes into pita bread. Who knew it would be so simple? You can and should experience the magic too, whether you choose to use supermarket yeast or a sourdough starter!

A pita pocket.


This post is part of Our Growing Edge, a monthly blogging event aimed at inspiring us to try new things. This month, it is hosted by Kerene from The Dream Baker.

Friday, July 31, 2015

Learning My ABCs (Asian Birthday Cakes)

Mainstream Western cakes that people bring to the office tend to be sweet, dense and moist—think the chocolate whisky cake from Rocket Kitchen, for instance. In contrast, Asian bakery cakes (which people tend to buy for special occasions like birthdays) differ in a few ways:
  1. they are light, soft, and airy
  2. they are less sweet
  3. they tend to have multiple layers
  4. they are covered in whipped cream
  5. they tend to have detailed, maybe even over-the-top, decorations
  6. bonus points for fresh fruit
  7. Asian flavours like taro, durian, mango, or green tea cakes are available

Fresh cream gateau from the Gateau House website.

While you or I could easily whip up a standard cake ourselves by following various recipes from a magazine or cookbook, not many people attempt to make the Western-style cakes* that are sold in Asian countries like Hong Kong, Korea or Vietnam (I was surprised to read this style of cake is also eaten in Mauritius.). Partly, I think it is because people in Asia don't tend to have an oven (they are more likely to steam cakes instead). But it doesn't help that there are not many recipes published for the cakes sold in Asian bakeries**, and they are often quite elaborate and challenging to make at home.

* I say "Western-style cakes" because traditional Asian cakes are a different beast, from the thick and dense mooncakes, to the chewy, steamed, bite-sized kuih.

** By "Asian bakeries", I mean bakeries similar to those you would find in Asian countries, not old-school bakeries that happen to be run by Asians.

There are now plenty of Asian bakeries in Auckland, including Gateau HouseLa Couronne, Classic Bake House, Well-done Bakery, and Rio Kitchen.

The "Sponge"

It turns out the part of the cake which I had always thought of as "sponge" is only sponge in the general sense, an umbrella term for foam cake. The particular kind of foam cake used in Asian bakery cakes is actually a reduced sugar chiffon. You'll end up with a lighter texture than if you used a standard sponge recipe anyway.

Type of Foam CakeEggsFatTextureOther Comments
SpongeWhites and yolks whipped separatelyNone (other than egg yolks)Firm, yet well aerated, relatively dry
GenoiseWhole eggsButterAiry, relatively dryRich flavour from butter. Less sweet than other foam cakes. Eggs are warmed before beating in sugar.
ChiffonWhites and yolks whipped separatelyOilMoist, light and springyRich flavour from oil. Often has added baking powder.
Angel Food CakeWhites onlyNoneDelicate, light and airyHighest sugar content to support egg whites.

There are all sorts of tips and tricks out there for baking chiffon cake, but the most important ones I found were:

The Cream

As you will see, the whipped cream topping was the part I struggled with the most. Freshly whipped cream tastes amazing, but I either overwhipped it and made it grainy, or it wouldn't hold its shape, and the cake looked like a mess by the time we went to cut it. No matter how hard I tried, my whipped cream did not have the amazing airiness and staying power of the commercial cakes.

I'm not sure what professional bakers use, but I wonder if it might possibly be an imitation whipped cream like Cool Whip or Pastry Pride, though I haven't seen these for sale in New Zealand, and I assume the flavour wouldn't be that great. The Cool Whip ingredients look pretty unappetising, with the main ones being hydrogenated vegetable oil and high fructose corn syrup, and containing less than 2% cream. Bakel's NZ has a new Easy Whip product that is made of dextrose, skim milk powder, vegetable oil, sugar, and stabilisers and emulsifiers. I guess that might be what you are eating if you buy something from those cheap, run-down bakeries.

Cool Whip Original ingredients from Kraft Brands website.

According to some posts online, whipped cream in bakeries holds up longer because it has a higher fat content, or has stabilisers added, such as pectin, xanthum gum or guar gum. Dr Oetker's Whip It product (available to home cooks in North America at least) contains dextrose, modified corn starch, and tricalcium phosphate.

You can achieve amazingly airy whipped cream by using canned whipped cream, as in Tatua's Dairy Whip. Nitrous oxide (N2O) is mixed into the cream and when pressure is released, foams the cream up to four times its liquid volume (compared to whipping by hand which only doubles it). Unfortunately, this whipped cream does not last long, and will go back to liquid form after 20 - 30 minutes.

Up until Lewis Road Creamery started selling double cream (48% fat) a couple of years ago, there was only one kind of cream for sale in New Zealand, with around 37% fat. I can't imagine bakeries making cakes with premium quality organic double cream, so I looked at what methods people used to stabilise their whipped cream:
Also, there's a buttercream recipe (fresh cream not needed) with rave reviews, which apparently has the texture of light whipped cream and is not too sweet. I'll definitely have to give this a go some time!


Cake Attempt #1: Chestnut Chiffon Cake

My parents gave me a bag of fresh chestnuts, so I decided to bake a cake with them in it. It really is a labour of love, because shelling chestnuts is a time-consuming exercise! Most recipes tell you to cut an X into the flat side, but I found it easier cutting a single slit along the rounded side of the chestnuts.

Shelling roasted chestnuts.

Although I had a tray full of roasted chestnuts, there was not enough there for the chestnut chiffon cake recipe I wanted to try, so I supplemented it with tinned chestnuts too.

Canned chestnuts (left) and roasted fresh chestnuts (right).

The sponge came out beautifully, though it did not rise much, presumably because I used baking paper, and did not invert the cake after baking.

Chestnut chiffon cake.

I used the fresh chestnuts in the lighter whipped cream topping, and the canned chestnuts in the intensely dark and delicious caramelly filling (enhanced with a nut flavoured liqueur).

Mixing chestnut cream.

I need to work on my technique a bit as the final cake was on the dense side, but the flavours were worth the effort!

A slice of chestnut chiffon cake.


Cake Attempt #2: Taro Chiffon Cake

Making a taro cake is a lot easier, because you can simply buy frozen taro from your local Asian grocer and steam it—it's not such a fiddly process as boiling, roasting and shelling fresh chestnuts.

Mashing steamed taro.

I used a Japanese chiffon cake recipe, and Eupho Cafe's taro filling (minus the coffee creamer). The chiffon cake came out very springy, but I found its flavour overwhelmingly eggy.

Japanese chiffon cake.

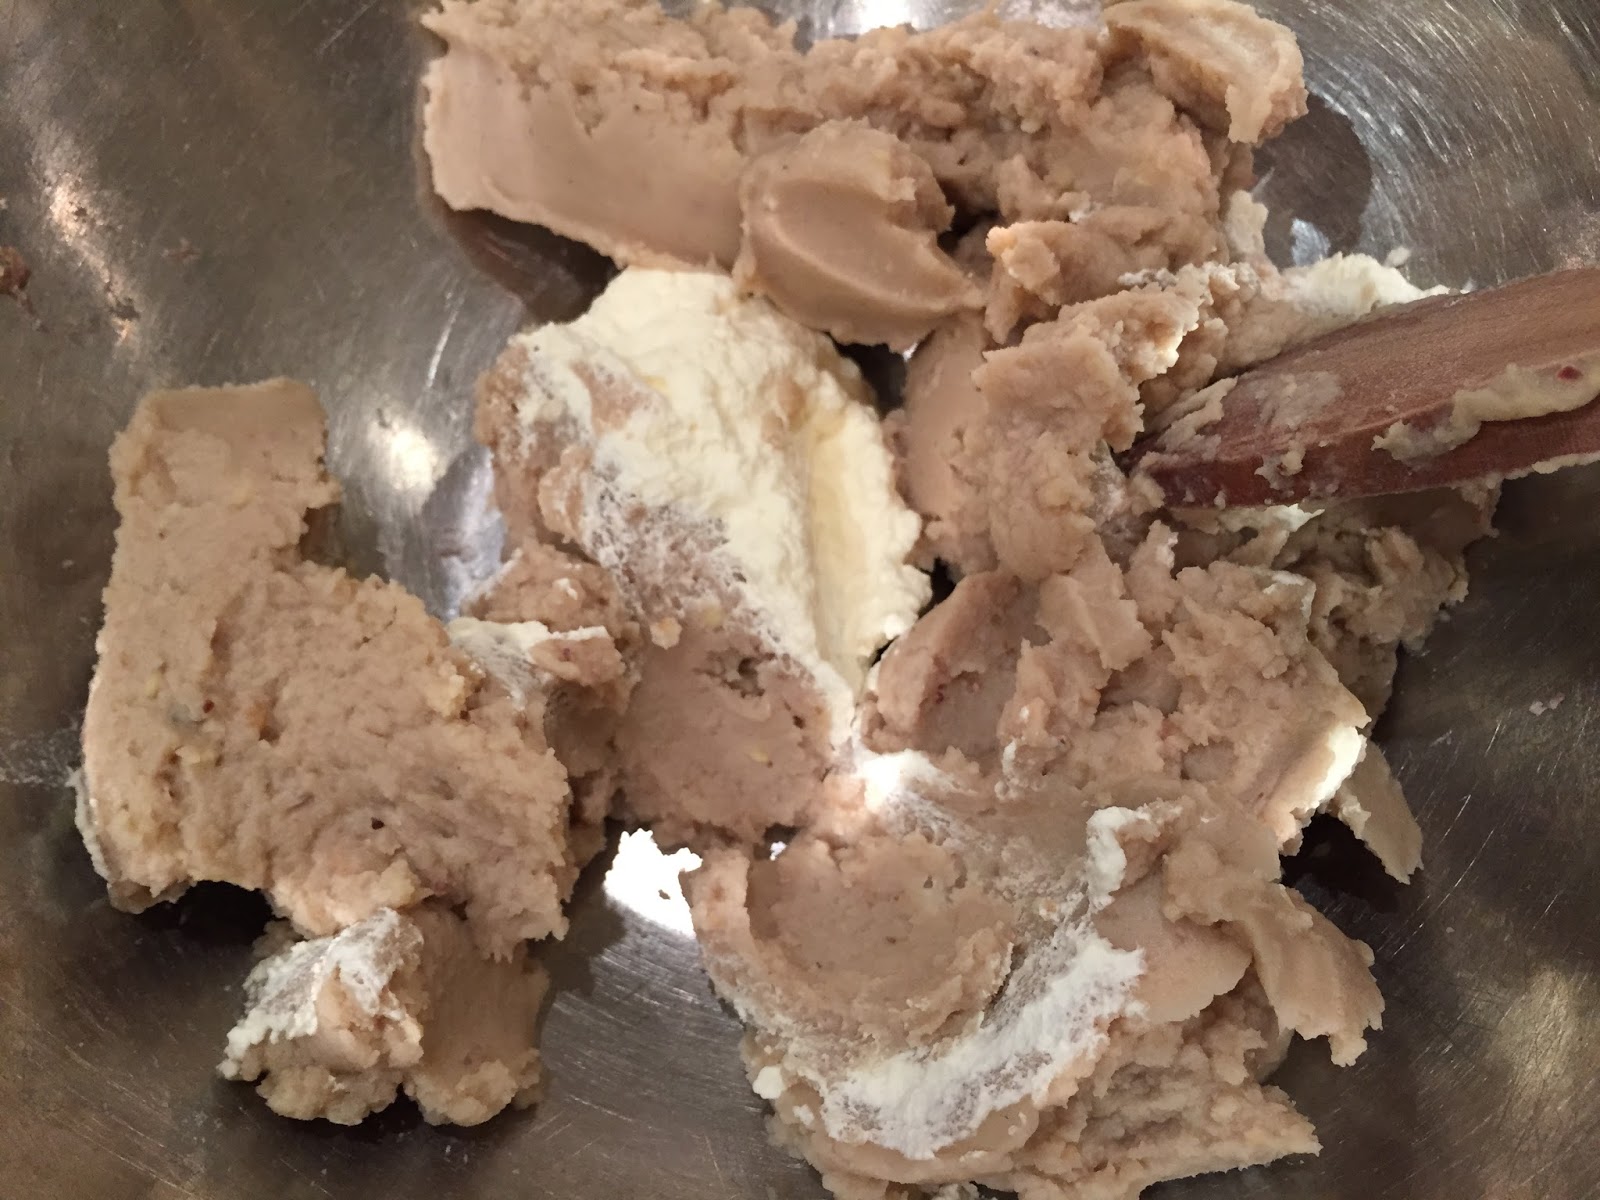
The taro filling was lumpy and solid when I first mixed it, but once I put it into the food processor for a few minutes, it turned into a smooth and fluffy spread.

Taro filling, smooth filling on top, lumpy filling at the bottom.

If it weren't for the strong egg flavour in the sponge, this would have been an excellent cake!

Cake Attempt #3: Durian Cake

In an attempt to reduce the egginess of the cake, I tried making an angel food cake, which only uses egg whites. Unfortunately, I lined the bottom of the pan with a circle of baking paper this time, and it made a crater when the cake was turned upside down.

Curved bottom of angel food cake.

It was also cloyingly sweet, though it did have a very soft and light texture. I ended up chopping it into cubes, coating it in dark chocolate, and palming it off to workmates.

Levelling the bottom of the cake.

Next, I tried Nasi Lemak Lover's Vanilla Sponge Cake. It had me baking the cake for over an hour, which was a lot longer than some other recipes, though admittedly at a lower temperature and for a higher volume of batter. The top of the cake split, and the outside seemed to have browned too much, so it was a bit dry and overcooked.

Overcooked cake.

I tried the recipe again, this time lowering the temperature at the end, turning the oven off altogether for the last 10 minutes. It rose promisingly high...

Cake rose high.

... but still cracked after further baking.

Flattened and cracked.

Although I turned it upside down for cooling, it actually shrank upwards (away from the bench), and ended up being pretty dark as well. The taste and texture of the sponge were pretty much perfect once I cut away the unsightly parts though.

Cake shrank on cooling.

With the chiffon sorted, I mixed up my own durian filling using about half a frozen durian (it takes a good few hours to thaw!) and about the same amount of sweetened whipped cream. I should have used a bit more sugar to bring out the flavour of the durian, but it seemed fine on its own, and I forgot to take into account the fact that the sponge part was not very sweet either.

Creamy flesh of thawed frozen durian.

I decorated the cake with whipped cream mixed with a bit of milk powder and icing sugar, and also added some slices of dried durian candy. Not the most beautiful of creations, but you'll love this if you like the aroma of durian!

My durian chiffon cake,

Cake Attempt #4: Mango Chiffon Cake

For my final cake, I made a mango chiffon cake with a layer of pudding mix in the middle, as well as custard (okay, maybe pastry cream is more accurate) and tinned mangoes.

I used the same chiffon recipe as before, but placed a piece of foil over the pan to protect the top of the cake once it started browning. I didn't get the same splitting and dark colouring I saw earlier, but it still sank even after being cooled upside down.

Some sinking in my chiffon.

Once you slice the top off, it doesn't really matter anymore though!

Chiffon cake, sliced horizontally.

I added less water to the mango flavoured pudding mix than instructed, so that it would have a more intense fragrance, but it was very sweet, so I thinned it out a bit again. I poured the liquid into a springform cake tin lined with baking paper, which wrinkled up from the moisture, as you can see in the picture below. After refrigeration, it set into a very slippery round of jelly which smelt more mangoey than real mangoes themselves.

Jelly-like mango pudding layer.

Although the jelly sat on top of the cake layer with no problems, the next layer (pastry cream with mango pieces which I dolloped on top) threatened to slide right off.

Pastry cream and mango layer on top of the pudding layer.

Indeed, that is exactly what happened, after the cake was transported to a restaurant, put in the fridge, and taken out again at the end of our meal. The entire top half of the cake shifted slideways, making it look like a spectacularly chaotic heap.

Top half of the cake slid to one side.

Looks aside, the cake tasted better than I expected, thanks in no small part to the Asian mango pudding mix, which also added an interesting texture contrasting with the softness of the cream and the sponginess of the chiffon. Thanks, artificial flavours and colours!

A very thin but tasty slice of mango chiffon cake.


This post is part of Our Growing Edge, a monthly blogging event aimed at inspiring us to try new things. This month, it is hosted by Pia from Joie de Vivre and Cupcakes, with the theme "party with friends".
Related Posts Plugin for WordPress, Blogger...