Monday, June 30, 2014

Homemade Puffed Rice

What do you do with old leftover rice? You know, the stuff that's been in the fridge for over a week and has gone dry and hard. Add water and make congee? But the flavours won't mix as well as rice porridge made from scratch. Turn it into fried rice? If you only have a small amount left over, it's hardly worth the trouble. Arancini? These fried balls are delicious, but ideally made with arborio rice, and you want a good amount of it too. Rice pudding? Great, but you've been meaning to cut back on the sugar.

Well, I've just discovered a new use for your old rice, even when there isn't much there—turn it into puffed rice!

Homemade puffed rice.

I didn't come up with this idea spontaneously. In fact, I wasn't even particularly trying to get rid of old rice. How I got onto this project actually started with a discussion about popcorn.

Initial Thoughts: Popping Corn

Popcorn is made from a type of corn with a hard, waterproof, outer shell and a starchy interior. When heated, the moisture inside wants to turn into steam, and pressure builds up within the hull. The starchy centre gelatinises under the heat and pressure, and turns into an airy foam when the hull finally breaks.

Although most of the popcorn sold in New Zealand is in the snowflake-like "butterfly" shape, we came across the other commercial variety with round "mushroom" shaped kernels while in Korea. It seems these are two different varieties of popcorn, so I was surprised to read that the kernels from a single cob of popcorn may form both butterfly and mushroom flakes.

ButterflyMushroom
Kernel sizeSmallerLarger
Optimal moisture before popping13.5-14%13.5-14%
Flake / Shape when popped (images from Wikipedia)Irregular, starburst with wings

Round ball

Texture when poppedLight and fluffyFirm and dense
Popping temperatureLower: from 175°C / 347°F, or ideally 204-238°C / 400-460°FHigher: 240-260°C / 464-500°F
AdvantagesFills up cinema boxes easily (high volume to weight)Good for flavoured popcorn as the even surface avoids pooling of flavourings; less fragile so easier to transport

I tried to discuss these popcorn varieties with my Korean friends, and they had no idea what I was talking about. They insisted the popcorn in Korea is just like here. Finally, we worked out what the problem was: while we would call both types "popcorn" in English, in Korean the word pabkon (팝콘) refers to the butterfly version only. The round popcorn is known as gangnaengi (강냉이), which also seems to be the North Korean word for "corn". If you can read Korean, you might like to check out this science project comparing the two popcorn varieties.

Goal: Puffed Rice

While I have tried making butterfly popcorn at home, I couldn't be bothered looking for mushroom kernels for me to play with. Plus, with the higher temperatures needed, it sounded like it would be impossible to cook them with butter without burning. Instead, I thought about what else could be expanded into a delicious snack. Apparently, many grains can be puffed, from amaranth to barley to oats to wheat. What I had on hand at home, however, was rice.

Unlike popcorn, rice doesn't come with a hard, waterproof husk to hold the moisture in and build up pressure. Raw rice you purchase from the shops also does not have enough moisture. If you attempted to heat rice the same way you do popcorn, chances are you will end up with burnt rice.

I decided to do some research and find out how other people puff their rice. As you will see below, there are differences not just in what processes are used, but also in the selection of the rice type. I also learnt some new terminology, for instance:
  • there is a difference between puffed rice (made from cooked or parboiled rice) and popped rice (made from raw rice)
  • paddy is the term for unmilled rice as threshed from the grass, with husk and bran; it is also known as rough rice
  • glutinous or sticky rice is also known as waxy rice
  • glutinous rice doesn't actually contain dietary gluten
Related Articles
Puffed Rice in India

I was totally amazed by the videos I found of puffed rice makers in India. From what I could see, skilled workers threw unmilled rice into a wok-shaped cooking pot filled with hot sand, and stirred until the grains puff from the heat. They scooped the contents out of the pot, shaking the sand out through a sieve, and that was pretty much it! They make it look so easy!


Sanjeev Kumar says the rice is cooked over low heat in iron kadais, but the temperature can't be that low, as the rice puffs in just a couple of seconds. There also seem to be variations as to how the rice is expanded: some say raw rice is used, completely dried in the husk, sometimes mixed with oil; others say the rice is soaked in salt water first, then either drained or dried. In one video, it looked like the rice was soaked and cooked first, with steam rising from the covered mounds. Other ingredients may also be added to make a delicious street snack.

If you know the Odia language, perhaps you can translate what they are saying in this video filmed in the Tangar Pada village? In the state of Odisha (formerly known as Orissa), where this was filmed, and in particularly in the district of Mayurbhanj, puffed rice is apparently such a significant part of the diet that Geographical Indications (GI) registration was sought.

In Assam, they have a specialty called hurum, which is made from glutinous rice.

Puffed RicePuffed Glutinous Rice
NameMurmura (Hindi),
Muri (Assamese, Bengali),
Mudhi (Odia),Pori (Tamil, Malayalam)
Hurum (Assamese)
Rice usedNon-waxy, e.g.
Waxy (glutinous or sticky) rice, known as bora, e.g.
  • specially-grown local rice variety called borbora
ProcessAccording to the TamilNadu Agricultural University:
"In the traditional process, the paddy is soaked in water preferably over night until saturation, drained and then either steamed or dry roasted in sand for parboiling. The parboiled paddy is milled, salted and again roasted in sand for expansion."
According to a villager who makes this:
"Paddy is first softened in water and subsequently steamed and heated. After the frying process, paddy is broken down by dheki, to separate rice from paddy. Thereafter, it is heated again with sand to get the crunchy product. The finished hurum is immediately sealed in polythene packs to avoid moisture from damaging it"
Texture when poppedLight and crispCrispier, larger and lighter

Obviously, apart from making puffed rice from traditional methods, there are also factories that produce this. Sadly, some have been caught burning tyres for fuel, damaging the health of people in the community, as well as the environment.

Related Articles
Puffed Rice in Vietnam

From the videos I found of puffed rice making in Vietnam, the process used is very similar to that in India. Although everyone filming seemed to be part of a tour group in the Mekong Delta (with commentary available even in foreign languages such as German), the puffed rice producers also work with unmilled rice, and heat it in a wok-shaped cooking vessel with hot sand. The main differences seem to be the use of sticky rice, a larger pan (presumably as this is part of a commercial operation at a candy factory), and the rice is put into sieves hung from the ceiling: first to remove the sand, then to remove the husks from the puffed rice. One video showed the puffed rice being mixed into caramel and cut into squares for packaging as a sweet snack.


Related Articles
Puffed Rice (Cakes) in China and Elsewhere

According to Echoes from Old China, the Hakka people are famous for the puffed rice cakes, made by steaming glutinous rice, drying it in the sun, and puffing it in hot sand, to make puffed rice cakes for New Year. This treat has also been taken to Hawaii. However, most videos I encountered online showed the use of an old-fashioned pressure cooker, which makes for a spectacular show.


I have seen pictures from 1938 of the Chinese use of a metal "popcorn hammer" or "popcorn cannon" to make popcorn, and some say this may have been invented in the Song Dynasty (960–1279) for puffing rice. The grains are placed in cast-iron cylinder, which is sealed, then turned over a flame to prevent the contents from burning. Pressure builds up inside, and when a certain level is reached, the container is opened with a loud bang, and the puffed cereal spills out into a prepared bag.

This method of popping rice is also used elsewhere in the world, including in Taiwan, in Japan, and in Korea.

There was also a video which seemed different from the rest, in that it looked like the rice was puffed directly in molten sugar, rather than being puffed first before being added.

Related Articles
Commercial Production

Despite popcorn and puffed rice having been made in Asia for centuries, Alexander P. Anderson is often credited as the inventor of the process for making puffed cereals such as puffed rice, which was introduced to the American public in 1904. It wasn't until 1913, however, when the product was marketed as "the cereal shot from guns", that sales really took off.


The problem with original gun-puffing process was that the cereals had to be popped in batches. In the 1960s, a continuous puffing gun was created, which increased output. Another commercial process, oven puffing, is described in a patent issued to Kellogg.

Puffing Whole Grains


Gun PuffingOven Puffing
Puffing mechanismRice cooked with steam under high pressure, followed by sudden pressure dropRice cooked and partially dried, then tempered, followed by a sudden application of high heat
Increase in volume6-8 times3-4 times
Grains used
  • Rice
  • Corn
Temperature200-260°C / 400-500°F82.2°C / 180°F (tempering)
232.2-301.7°C / 450-575°F or 290-340°C/ 550-650°F (in later stages of baking)
Pressure1,380kPa / 200 psi, about 13.6 times the atmospheric pressure at sea levelAtmospheric
Moisture5-7% (puffed grains)
1-3% (after drying)
25-30% (cooked rice)
18-20% (after drying)
<3% (after baking)

Extrusion

Most puffed snacks today are made using an extruder. Rather than working with whole grains, a dough made from (rice) flour is squeezed through a die under heat and pressure (150-175°C at 5-10kPa). After drying the pieces to the proper moisture level (from 20-24% down to 9-12%), a sudden release of pressure gun-puffs and dries the shaped dough again at the same time, to obtain the final moisture of 1-3%. This process has a number of advantages over gun-puffing whole grains:
  • greater increase in volume
  • higher production rate
  • greater versatility in product shape
  • easier control of product density
Last year, Cornell University announced a new method of making puffed rice by supercritical fluid extrusion.

Related Articles
Making Puffed Rice at Home

So... I don't have commercial equipment, a small puffing machine, or a fiery pit to work with sand. I decided to go with the frying method instead. Despite a blogger saying you can puff rice with only 1 tsp oil, it seemed safer to deep-fry, since I have actually seen videos of this working. I am also keen to see if using salt instead of sand would work, though I am not sure if my wok would be able to withstand the heat, and would rather see someone else try it first.


I used jasmine rice, as that was what I had at home, and tried several different methods: frying raw rice, soaked rice, cooked rice, and dried cooked rice.

Raw Rice

I can tell you right now, dropping raw rice in hot oil isn't going to work. There is not enough moisture in the grains for the starch to expand. Even after leaving the rice in for much longer than any of the other trials, nothing seemed to happen.

Raw rice before (left) and after frying (right).
Soaked Rice

If lack of moisture is the problem, it only seemed natural to try soaking the rice in water first. I had the rice soaking for several days so the water could hopefully work its way to the middle of each grain. Unfortunately, I did not give time for the outside to dry, so it splattered when it hit the oil. Still, the grains did expand a little, and became translucent with frying. The end result was quite hard though.

Soaked rice before (left) and after frying (right).
Cooked Rice

Cooked rice is nice and soft, and is expanded somewhat already. This batch was sitting in the refrigerator (in an enclosed box) for a couple of weeks or so too, so it was not too wet. The grains puffed a bit on frying, but stuck together in a clump.

 Cooked rice before (left) and after frying (right).
Dried Cooked Rice

Dried cooked rice is what most people recommend using, and this gave by far the best result out of the variants that I tried. I left the it out for around two weeks, so it looked translucent, shrunken and cracked. It only took a few seconds to puff in the hot oil, and each piece remained distinct, rather than sticking together.

 Dried cooked rice before (left) and after frying (right).
Dried cooked rice before frying.
Conclusion

I made the best puffed rice by frying dried cooked rice in hot oil. This was crispy and delicious, though it also sometimes left some chewy bits stuck to your teeth. You'll need to turn it out onto paper towels to remove as much of the oil as possible.

My puffed rice was quite different from the rice bubbles you can buy in the supermarket, which are mixed with sugar, salt, barley malt extract, and added vitamins and minerals.

My homemade puffed rice (left) and Sanitarium Ricies (right).
I'd like to try some other methods of making puffed rice, but I was quite pleased with the results as they were!

This post is part of Our Growing Edge, a monthly blogging event aimed at inspiring us to try new things. This month, it is hosted by Phuong from My Kitchen of Love.

Saturday, May 31, 2014

Homemade Eggettes or Gai Daan Jai (雞蛋仔)

While most of you have probably been helping yourself to chocolate Easter eggs last month, my mind has been occupied by an entirely different kind of eggy treat: the Hong Kong street snack called gai daan jai (雞蛋仔), which translates to a diminutive of the word for egg. For this reason, I prefer the terms "eggettes" or "egglets", though they are known by a variety of names, including Egg Waffle, Hong Kong Waffle (even though they actually sell the waffles with the grid pattern in Hong Kong as well), Waffle Balls, Bubble Waffle, Mini Egg Puff, Egg Cake, or simply Gai Daan Jai.

My homemade gai daan jai.

The basic ingredients of this iconic Hong Kong street food are only flour, eggs, and sugar. But there are many variations, and businesses will not share their secrets lightly. The quality between the different vendors can differ greatly, as we discovered first hand, and they look deceptively easy to make. After fail after fail in my kitchen, however, I can assure you that these simple snacks require a high level of skill indeed!

History

Although there is no definitive answer as to how gai daan jai were invented, most people seem to say they originated in Hong Kong around 1950, as refugees fleeing civil war in China flooded into the city. With a growing population, entrepreneurs came up with creative ways to make the best use of scarce resources under strict government price control. Apparently, back then, eggettes were cooked at streetside carts over charcoal stoves, and sold by the egglet for 1 cent.

Some claim they began as a way for small grocers to use up broken eggs, while others say the egg-shaped mould was used to make up for an eggless batter. Eggs may be less of a luxury these days, but it is certainly harder now to get hold of the more flavourful duck eggs which some sellers used at the time.

Sadly, it is now illegal for most waffle vendors to ply their trade in the streets of Hong Kong. With a goal of public health and safety, government officials stopped issuing new hawker licences in the early 1970s. High profile arrests of traditional but permitless cart holders have provoked public outrage, with commentators lamenting the loss of the city's street food culture.

Eggette seller cooking over a charcoal stove.

Makers of eggettes have also largely abandoned the use of charcoal stoves for gas-powered ones, or have switched to electric moulds.

Related Articles
Videos in Cantonese
  • 《文化多面睇 炭燒雞蛋仔伯伯》 (NOW BNC, 2 September 2012) - Mr Ng, a 75-year-old eggette seller who entered the trade in 1982, still uses charcoal stoves and shares his recipe with kids; he cannot afford to open a shop, and the government stopped issuing hawker licences in the 1970s, hence the illegal work; misinformation also led to demise of the street-sellers (posters showed them as horrific and dirty)
  • 《名廚。食出五味人生》 (i-Cable Channel 12 娛樂台, 9 September 2012) - Mr Ng says that no eggs were used at the beginning; eggettes take 8 minutes to cook; interview with Eric from Gu Fah Bakery, a specialist eggette store with modern flavours, using beer to make the dough rise.
  • 《雞蛋仔。香港地道小吃 (Firewalk Productions, 25 November 2012) - Mr Liu, owner of LKK North Point Eggettes, says his mother used duck eggs in the 1950s; it takes 7 - 8 minutes to cook an eggette; he makes a batch of batter using 400 eggs.

The Ideal

In a previous post, I shared our favourite spot in Hong Kong for eating eggettes. While eggettes from other vendors are frequently disappointingly limp and soggy, those from LKK North Point Eggettes are consistently fresh and crunchy on the outside, with a soft pillow against one side inside. As another blogger aptly describes it, they are addictive, "just like popping bubble wrap".

I would say that excellent eggettes need to have the following characteristics:
  • crisp on the outside, but soft on the inside
  • the little balls should be interconnected, so you can snap them apart with satisfaction
  • they should be evenly lightly golden, with the balls the same colour as the bits joining them together
  • smooth shiny surface
  • fresh, fragrant flavour
Related Articles
Equipment

Unlike Chinese egg rolls, you definitely need specialist equipment to make eggettes. How else would you be able to mould your batter into little balls?

I wanted something basic, so I purchased a traditional eggette pan from Shanghai Street in Hong Kong. These old fashioned devices are basically made of two metal moulds that fit together, attached to wooden handles. I was surprised to see that the two halves were not the same - the bottom was significantly deeper than the top half.

Traditional eggette pan.
There are very few of the old-school eggette craftsmen left, who still use the traditional moulds over charcoal fires. Most commercial eggette sellers in Hong Kong now use electric eggette makers, which can simultaneously heat your batter on both sides, as well as providing a constant, controlled temperature without any effort from the cook. They may also have a Teflon-coated surface, so the waffle can be removed easily.

Egg waffle maker from Alibaba and Shentop.

If you can't get hold of either of the above, then you might want to consider Western-style eggette makers, which don't look quite right because they tend to make completely round balls rather than egg-shaped ones. As before, you can either get these as a standalone pan, or as electric one.

Nordic Ware Egg Waffle Pan and CucinaPro Bubble Waffler.

Recipe for the Batter

Depending on what you search the internet for, you will end up with different recipes for gai daan jai. I ignored the ones that were clearly not what I was after, such as those using pancake mix or a sourdough starter.

Looking for "eggette recipe" or "Hong Kong waffle recipe" turned up two basic recipes, with a number of different sites repeating them (sometimes without accreditation!). Christine's recipe provided by Anne Yeung (published September 2010) is the more Asian version and seems to be very popular. It has the same proportions of ingredients as the recipe shared by I Love Cake (video uploaded September 2009), but differs slightly in the method, for instance not using an electric egg beater, adding the oil after the flour (rather than mixing it with the wet ingredients), and letting the batter stand for an hour in the fridge instead of at room temperature. It is also almost the same as Recipe 1 shared on the eGullet forum (posted July 2005). The other recipe that frequently pops up is the one provided by Williams-Sonoma, which seems totally inauthentic, calling for the egg whites and yolks to be beaten separately, and adding unconventional spices in the form of nutmeg.

Search for "gai daan jai recipe" and you get the same top hits, but also a couple of extra recipes such as one from Hong Kong Lightbox (published August 2008). This recipe is nearly identical to the one I found in Fan-Yuk Hui Chan's Chinese-English cookbook 香港特色小吃 Distinctive Snacks of Hong Kong (17th edition published February 2010, first published September 1998), but with the use of cornflour rather than tapioca starch. As a reviewer pointed out, despite the book having an egg waffle on the cover, it "doesn't taste like the real thing". There is also a recipe from Wynwyn's Place, which is given without any description or picture, but has a higher egg content than the other recipes I have seen so far.

Google "雞蛋仔" or "雞蛋仔 recipe" and there are a few more new recipes, such as one given by Yvonne Lo (published July 2010), directly after writing about the Lee Keung Kee North Point Eggette shop—though I am pretty sure the business owner would never give his recipe away. I also found a recipe in Chinese (published April 2012) that was different again, with no evaporated milk.

I think the oldest recipe I found online was one posted in Google Groups in September 2003 by Betty Lee, who in turn was quoting Anna Au (though the address http://www.pipeline.com/~rosskat/wizzab.html does not exist anymore), who had found a recipe in her sister's Chinese cookbook. It had a high ratio of eggs, unlike another recipe from a Reddit forum post, which had far more flour and water.

Searching for videos on YouTube turned up a few more variations. For instance, the eggettes from the Gu Fah Bakery (古法烘焙) are apparently made with beer. Mr Ng, the "eggette uncle" (雞蛋仔伯伯) who was arrested and heavily fined multiple times for selling these delicious snacks (and has now sadly passed away), shares his simpler recipe containing only the four ingredients of egg, flour, sugar and oil - though he also adds a powdery "secret ingredient" as well as water.

I suspect, however, that technique you use has as much, if not more, to do with the outcome than the recipe you choose.

Technique

I wanted to reproduce the eggettes of the LKK North Point store, and watched a bunch of videos of their creations being cooked. However, as they use electric waffle irons, I was not able to learn much. Basically, they pour the batter to fill the indentations, then flip the pan once, and pretty much just leave it for 7-8 minutes. This would not work with my eggette mould as I can only heat one side at a time. They then remove the eggette, curve it, let air from a fan blow across it, and put it into a paper bag with breathing holes.

Clearly, I would need to learn from the charcoal stove eggette makers instead. Rather than flooding the mould full, they pour the batter in a spiral pattern to make a thin coating, then swirl the pan around in all directions to distribute the contents. Sometimes I see them wiping down the flat sides with a cloth while the eggette is cooking. They flip the pan 3 to 5 times, and the finished product is ready in less than 2 minutes in many cases. Unlike the ones at LKK, these eggettes just drop out of the mould when cooked. The waffles are cooled flat, and often fall apart when being bagged. I guess they must be delicious and crispy, when people will queue for an hour for them.


My Learnings

I learnt a lot of things in the course of my experiments, other than the fact that the mould is pretty heavy.

Tip 1: Season your pan

NB. Do not do this if you have a non-stick pan! When I first started making eggettes, I brushed oil on to the mould before pouring in the batter. After burning the bristles of my brush by mistake, I switched to the quicker method of using cooking spray. But even though I sprayed between every single batch, the waffles still stuck to the pan.

Eventually, I realised I was doing something wrong, and looked up how to season my pan. I brushed oil onto the cold cooking surface (not forgetting the edges), then fired up the gas burner and heated the mould until the oil began to smoke. I switched off the heat and let the pan cool, before wiping away excess oil with a paper towel, and repeating the whole process again.

Seasoning the pan not only made it easier to remove the egg waffles, it made the browning of the cake a lot more even. I guess you see the same effect when you are making pancakes, when the first lot (where you added oil) has more colour contrast than the later versions (where you are cooking on a dry frying pan).

Uneven cooking in unseasoned mould, with dark and light patches.

Oh, and as you will be burning oil during the seasoning process, don't forget to open the doors!

Tip 2: Pick an eggy batter

Mr Liu said that the secret to his LKK North Point eggettes is to use plenty of eggs. At first, I thought this was just a marketing gimmick, just a thing that was mentioned to avoid giving away the true secret of his recipe, and to make it sound like his creations were worth more, being made with more expensive ingredients for extra flavour.

Having tried a few different recipes now, I have to say the ones with more eggs definitely taste better. Not only that, they give rise to a crispier result. In contrast, the more watery batters took longer to cook and had a habit of expanding (presumably from the steam) during cooking.

These eggettes pushed the two halves of my mould apart.
Although I am still experimenting, my favourite recipe so far is the one from Wynwyn's Place, which looks like this:
3 eggs
1/2 C sugar
2 T butter, melted
1/4 C milk
2 T cornstarch
2/3 C flour
1 t baking powder
1. Beat eggs whilst gradually adding sugar until fluffy.
2. Gently stir in milk.
3. Sift dry ingredients into egg mixture. Fold gently to combine.
4. Stir through melted butter.
5. Grease waffle plate with oil and heat on stove. Make sure plates are hot before adding batter.
6. Fill plates about 60% full with batter and cook over moderate heat for approx. 2 minutes on each side or until golden and puffy.

Tip 3: Pour your batter from a jug

I started off being lazy and just scooped ladles of batter onto the eggette mould. It is much more efficient, and easier to get the batter to where you want it, if you have everything in a jug though, so you can simply pour it as you wish, rather than having some batter cook while you are reaching for another ladle.

Tip 4: Line your stovetop with foil

There are going to be accidents. Batter will drip out of the pan. If you want to save yourself all the cleaning effort later, line your stovetop with foil first.

Spilt batter - should have lined the stovetop earlier.

Tip 5: Swing your pan to distribute the batter

You want the little balls to be interconnected. If you just pour the batter into the indentations and don't move your mould around, you will end up with discrete spheres that don't hold onto their neighbours. Swinging your pan will ensure that the batter goes up the sides rather than pooling at the bottom, so that your creation does in fact look like little eggs.

Separate balls from not getting batter in between them.

Tip 6: Let it breathe

After cooking, don't just throw your eggettes in a pile. You want to leave them spread on a cooling rack so that the steam can evaporate. You can also help this process by fanning away the moisture.

Final Tip: Practice makes perfect!

Don't give up just because your first batch was no good! Nobody gets it right the first time, and those professionals who make it look so easy have been practising for years!

One of my failures.
Better eggettes made later that same evening.
Hope you enjoy making eggettes yourself, and let me know if you have any other tips to share!

This post is part of Our Growing Edge, a monthly blogging event aimed at inspiring us to try new things. This month, it is hosted by Eva from Kitchen Inspirations.

Wednesday, May 28, 2014

Review: Ramen Do, Eden Terrace

Ramen Do is the one of the best, if not the very best, ramen place we have sampled in Auckland , so I am not sure how I took two and a half years to write this post, after previously only giving it a quick mention. Since we first visited, this Japanese eatery not only has a new website, rearranged their furniture, and learnt to make perfect eggs with a translucent centre (originally they were simply hard-boiled), but they have also opened a new branch in the central city [Added 7 November 2014: this didn't do well and has closed]!

Small venue on Symonds St made larger by a mirror and high ceilings.

As they proudly proclaim on an embroidery on the wall, their flavourful soup bases take two days to produce, and they also make their own noodles in-store.

Wall hanging with a message for the customer.

The signature dish is the Hokkaido Miso Ramen, which contains slices of BBQ pork and pork belly, a ball of minced pork, and half a beautifully boiled marinated egg, in addition to the noodles, broth and garnishes. We particularly appreciated being given a small suribachi and surikogi set for grinding whole sesame seeds, which released a strong and fragrant aroma.

Hokkaido Miso Ramen.

Another dish we keep having over and over again is the Tsukemen, which consists of firm, cold noodles in a separate dish from a concentrated and rich soup for dipping. The first time we ordered this, we had no idea what to do, and poured the sauce over the noodles! The soup comes with pork slices and half a marinated egg, as well as a teapot of what appeared to be the noodle-cooking water, so you can thin the salty liquid and turn it into a tasty broth after your meal. A great choice if you prefer a bit of bite to your noodles, as you control how long they sit in water, though everything does tend to be more luke-warm than hot.

Many components of tsukemen.

If you stray away from the restaurant's main focus, the food you get will not be as tasty. For instance, the vegetable ramen felt thin and watery, though the vegetable toppings themselves were fine..


Vegetable ramen.

The takoyaki we tried were somewhat undercooked in the middle.

Takoyaki, a bit soft and undercooked in the middle.

The edible wild plants inari were very enjoyable, though not amazing the way the top ramen were.

Edible wild plants inari.

Moral of the story? Stick to Ramen Do's consistently excellent specialities!

Panda Recommends

We love the Hakkaido miso ramen ($13) and the Tsukemen ($15).

Vegie Pandas
There are a couple of vegetable ramen options, with plenty of vegetables in them, but the soup base is obviously less flavourful and interesting than the meaty versions.

Menu - ramen

Menu - other

Restaurant Details

Ramen Do
167 Symonds St, Eden Terrace, Auckland
(09) 377 1313

Opening hours:
Mondays to Fridays 11:30am - 3pm, 5:30 - 9pm
Saturdays to Sundays 12 - 9pm

Ramen is a little shop on Upper Symonds Street.

View Nom Nom Panda in a larger map

Sunday, May 11, 2014

Review: Sun World Chinese Restaurant (新世界海鲜酒家)

According to the Cuisine Magazine, Sun World was one of the first places in Auckland to offer yum cha. It is certainly still very popular, with queues going out the door during the busy weekend yum cha rush. As a Chinese seafood restaurant, it also has an excellent a la carte menu, and plenty of live seafood for you to look at while you wait, from lobsters to paua (abalone) to geoduck to clams.

Kids checking out the lobsters by the front door.

The restaurant's Chinese name 新世界 actually translates to "new world", but the word "new" in Cantonese is pronounced "sun", and presumably they didn't want to call themselves "New World" to avoid confusion with the supermarket chain. It has apparently been in Newmarket since 2000, and every time I go I wonder what used to be there before that, because the Roman gladiators on the side glass doors don't seem entirely in theme.

Roman gladiators on the side doors.

Yum Cha

The restaurant's website says that they have been offering yum cha since 2007 (fellow blogger Her Worldly Pleasures has documented some dishes from this time). Perhaps that is true for their Newmarket location, but friends remember having yum cha at Sun World when it was still in town, and yum cha has been available in Auckland for at least 25 years, if memories serve correctly.

At Sun World, as with most restaurants of this type in Auckland, yum cha is still offered in the traditional way, with someone pushing trolleys or carrying trays around, although you can, of course, also order a dish rather than waiting for it to appear.

Trolleys with a variety of dishes, from dumplings to spare ribs.

We found the options at Sun World to be varied and plentiful, so it was easy to select different dishes without waiting a long time for what you want. All the usual delicacies were available, including the various steamed dumplings, congee, ricesheet rolls, pork spare ribs, turnip/taro cake, and BBQ pork buns. For dessert, there was also plenty to choose from, such as egg tarts, jin deui (fried sesame balls), various buns and bak tong gou (steamed "white sugar cake").

Yum cha favourites including siu mai, pork spare ribs, chicken feet, and chicken tail buns.

The food was fresh and tasty, and even when we picked the special (more expensive) dishes like deep fried crab or vegetables in oyster sauce, the bill came to a surprisingly small number. Sun World definitely offers one of the best yum cha experiences in Auckland!

Steamed things, fried things, baked pastries - all are available and delicious.

The only reason we don't eat here as often as we would like is that the place is almost too popular. The crush of people and the long queues can be off-putting. Sometimes the waiters are so rushed that they forget to bring your tea, or you find that you have to wait for some time before you get all your crockery. But hey, it is all part of the fun, and did I mention that the food is good?

Dinner

Dinner at Sun World is less frantic than the lunchtime yum cha sessions, so you will have better service and a more relaxing atmosphere to go with the excellent cooking.

Free range chicken with garlic ginger paste.

As with all Chinese restaurants that are not cheapie eateries, you should go with a group and order a variety of dishes so that you can share a balanced meal. (It sounds ridiculous saying this, but one knowledgeable person should do the ordering. I have seen customers unfamiliar with the cuisine attempt to get each person to pick something they like, and it always ends in disaster, even if there are no duplicate dishes, e.g. no one orders vegetables. In case of doubt, ask the waiter for advice.)

Stuffed tofu.

The menu is large, but everything we tried was of a high standard, both well-presented as well as having great authentic flavours.

Steamed fish and roast meat.

Sun World is a popular institution in Auckland with good reason!

Restaurant Details

Sun World Chinese Restaurant (新世界海鲜酒家)
2A York Street, Newmarket, Auckland
(09) 520 3218

Opening hours:
Mondays to Fridays 11am - 2:30pm, 5:30 - 10pm
Saturdays to Sundays 10:30am - 2:30pm, 5:30 - 10pm


View Nom Nom Panda in a larger map

Tuesday, April 29, 2014

Eating at a Stranger's House

Have ever invited yourself to a stranger's house for a meal? Not a friend of a friend's place, nor that of someone you've chatted with online, but the home of a complete stranger, someone you have never met or communicated with before. That's what I ended up doing the other day.

It wasn't exactly something on my bucket list, but when the team at The Lucky Taco shared a pop-up event called LAK$A LAK$A organised by one of their crew, Ruby, a.k.a. Miss Changy, I couldn't help but enthusiastically buy a bunch of tickets for me and my friends (never mind that they couldn't make it and I ended up getting some others along).

Enticing artwork for the event.

What's not to love? Here was someone brave enough to invite others into her own home (though she probably never expected random people like me to turn up), with colourful artwork and the promise of delicious Sarawak laksa cooked by a chef who, with her family from Borneo, knows the real deal. I was interested to find our how this dish differed from the curry laksa most places sell in Auckland, and I wanted to support people who share their food with others, especially when it is something unusual and authentic.

Miss Changy encouraged us to treat her place like a cafe. There was no set time, but wide time windows, so we could turn up for lunch at any point between 12 and 3pm. She also had a dinner session from 6 to 9pm, with each session limited to a maximum of 20 people. I really liked this approach, as it meant we did not have to stress about arriving punctually. It would also have been easier on the chef to have the visitors staggered, so she did not have to prepare the dishes all at once.

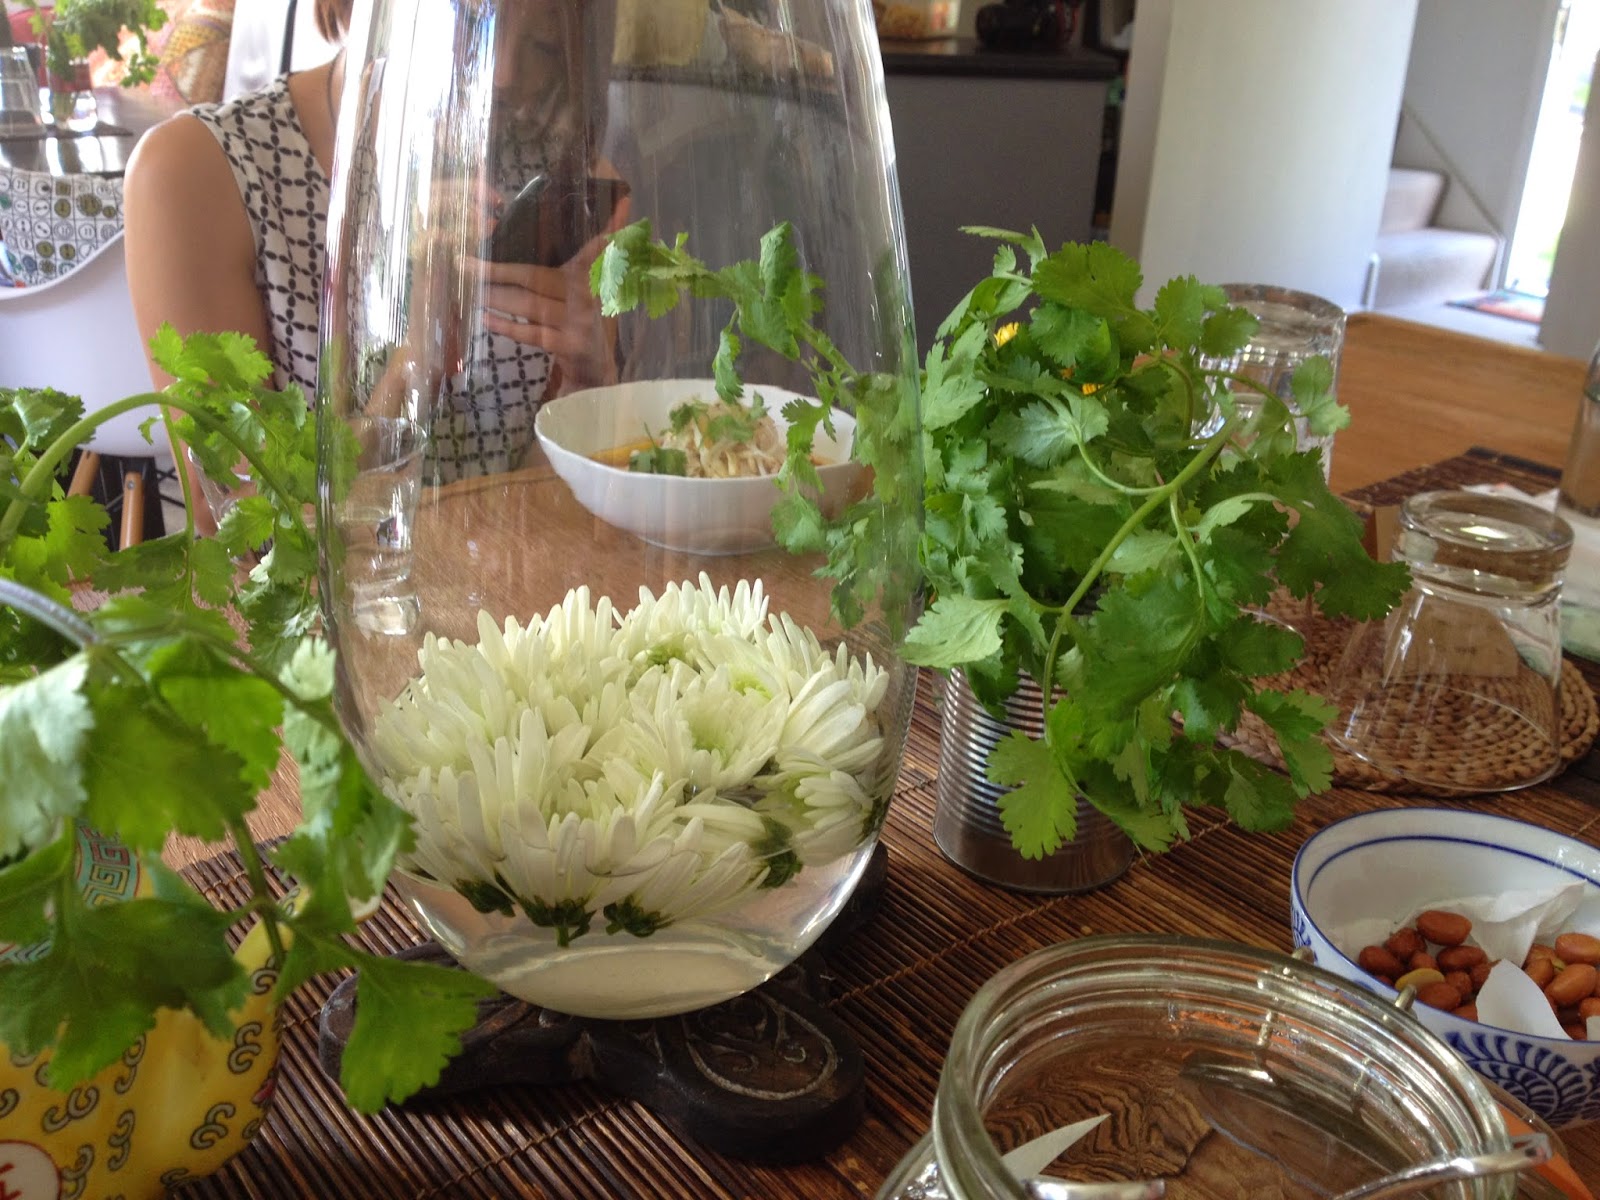
While we were waiting, we were given little bowls of roasted peanuts. Cue surprise and delight—no one had mentioned we were getting anything other than laksa. We also admired the fresh flowers and general ambience.

Table decorations - but the coriander was for eating as well.
At this stage, you are probably wondering about the laksa. This was beautifully presented, with a mound of rice noodles, omelette strips and shredded chicken rising above the soup base. There was also a prawn hidden inside. We thought the soup had a spicy and tangy flavour, and tasted like it had some curry in it, but little if any coconut milk.

Sarawak laksa served by Miss Changy.
This seems to contradict the Wikipedia description, which claims Sarawak laksa has no curry at all, but "a base of sambal belacan, sour tamarind, garlic, galangal, lemon grass and coconut milk, topped with omelette strips, chicken strips, prawns, fresh coriander and optionally lime." Perhaps our tastebuds were defective, or perhaps the online entry is wrong, but the toppings pretty much described exactly what we were eating. Our host also encouraged us to pluck extra coriander from the display on the table, and offered a vegetarian alternative with tofu instead of chicken.

We enjoyed our meal (though we would have preferred it to have been heated to a higher temperature), but it was what came next which blew me away. Completely unexpectedly yet again, we were given a little stack of sesame crisps. I love sesame in any form, but my recent trials with sesame brittle produced something cloyingly sweet and teeth-breakingly hard. The crisps from Miss Changy were far superior, with a high sesame content, brittleness without hardness, and best of all, very little sugar. The recipe, she told us, makes use of egg whites. Genius!

Sesame crisps served after our laksa.

All in all, great concept, great passion, and great food. There was nothing that practice wouldn't solve, and we hope there are more events like this coming!

[Added 20 August 2014: We have since tried Miss Changy's homemade noodles and absolutely loved them!]

This post is part of Our Growing Edge, a monthly blogging event aimed at inspiring us to try new things. This month, it is hosted by Dana from I've Got Cake.

Friday, April 25, 2014

Review: Burger Burger, Ponsonby

You may remember a post I wrote last year about medium-rare burgers in Auckland. Well, that's old news. A week or two ago, Burger Burger opened in Ponsonby Central, and blew the competition out of the water. Not surprisingly, it has become enormously popular already, with queues forming outside at peak times.

Vibrant decor inside the little eatery.

Situated next to Maldito Mendez, where Wang Thong Thai Fusion used to be, this little place really knows their burgers. The bun is sweet and soft, and grilled to perfection with lightly charred edges. The meat, whichever form you choose, is fresh, and most importantly, the beef is served medium-rare by default. The chefs, five or so of them in the narrow kitchen, move like clockwork, assembling burger after burger to order, so that your rumbly tummy is satisfied as soon as possible.


The beef burger we had (after much umm-ing and ahh-ing, we also added aged cheddar cheese) was by far the best we have eaten in Auckland. Not only a pleasure for the tastebuds, it was also easy on the pocket, costing only $10 for the burger and $2 for any additions. If we were forced to critique, the only improvements we would like to see are a) giving a processed cheese option, and b) maybe replacing some of the pickle (there was a lot of it) with lettuce.

Beef burger with cheese.

The chicken burger was excellent as well, with the meat expertly chargrilled, and deliciously paired with rocket aioli and a capsicum salsa. The fish burger was also beautifully cooked, with a freshly fried crumbed coating. In fact, pretty much all the burgers were fantastic, the highest quality we have encountered, and great value at BurgerFuel pricing.

Burger lovers who are vegetarian or gluten intolerant are also catered for, with a falafel patty version, as well as the option of swapping the traditional bun for "bunnuce", a.k.a. cos lettuce leaves.

Vege bunnace for a greener fix.

The sides are great too. The shoestring fries we ordered were fresh and crispy, not at all oily-feeling, and came with a generous portion of aioli.

House honey cola and shoestring fries with aioli.

The charred broccoli is healthier but also very tasty, with garlic butter and toasted almonds adding to the flavour.

Charred broccoli with garlic butter and toasted almonds.

If we weren't already so full, we would have loved to have tried the milkshakes, made with organic milk from Lewis Road Creamery and ice cream from Little Paddock. Like the house-made honey cola pictured with the fries above, these came in thin glasses shaped like soft drink cans, and had syrup drizzled down the sides. There is also a large selection of alcoholic drinks. Oh, and dessert.

It's not just the food which is great at Burger Burger. We love the thought and design that has gone into the brand, the friendly and talented young staff members who informed us all the sauces and things were made in-house (though service can be hit-and-miss), and the reasonable pricing despite quality ingredients.

Panda Recommends

You are having burgers for your mains, no question of that. We like the classic beef burger ($10, optional cheese for an extra $2), but really, practically everything is good.

Vegie Pandas
Well, maybe the vege burger isn't as great as all the hype would lead you to hope for, but at least you haven't been forgotten about. Plus, you have sides and desserts to try too.

Menu - page 1

Menu - page 2

Restaurant Details

[Added 1 April 2015: Burger Burger now has a larger branch in Newmarket.]

Burger Burger
The Lane, Ponsonby Central, 4 Brown Street, Ponsonby

Opening hours:
Sundays to Wednesdays 11:30am – 10:30pm
Thursdays to Saturdays 11:30am – 12am

Entrance to the little eatery.


View Nom Nom Panda in a larger map
Related Posts Plugin for WordPress, Blogger...